

As a driver, it’s no secret that you’ll eventually run into issues with your vehicle that requires service. Whether it’s big or small, it’s important to service your vehicle regularly to help minimize your chances of a breakdown! However, an issue that owners of older vehicles might run into is your battery dying. But, how can you tell if your vehicle’s battery is running on its last leg? Are your headlights dimming? Are you regularly in need of a jump-start? Is your battery more than three years old? If you’re saying yes to all of these things then it might be a good idea to get a battery test. With the winter months creeping up on us, it is especially important that you get your vehicle’s battery replaced before you find yourself broken down in the cold! Fortunately, replacing your battery is so simple that you can do it yourself! Of course, if you don’t have the time or tools to replace it yourself, don’t sweat it, just head over to our site and schedule a service appointment today! But if you love DIY, be sure to check out our how-to below!
Younger Nissan’s Guide To Changing Your Battery:
- With your vehicle parked on a flat surface, parking brake engaged, and your vehicle’s engine turned off, pop open the hood and locate the battery. Be sure to give your vehicle enough time to cool down before working on anything under the hood (about 30 minutes). Then, detach the negative cable (black) from the battery. Loosen the nut with a wrench, twist the end of the cable with your hand and pull the cable away from the battery terminal. Repeat with the positive cable (red).
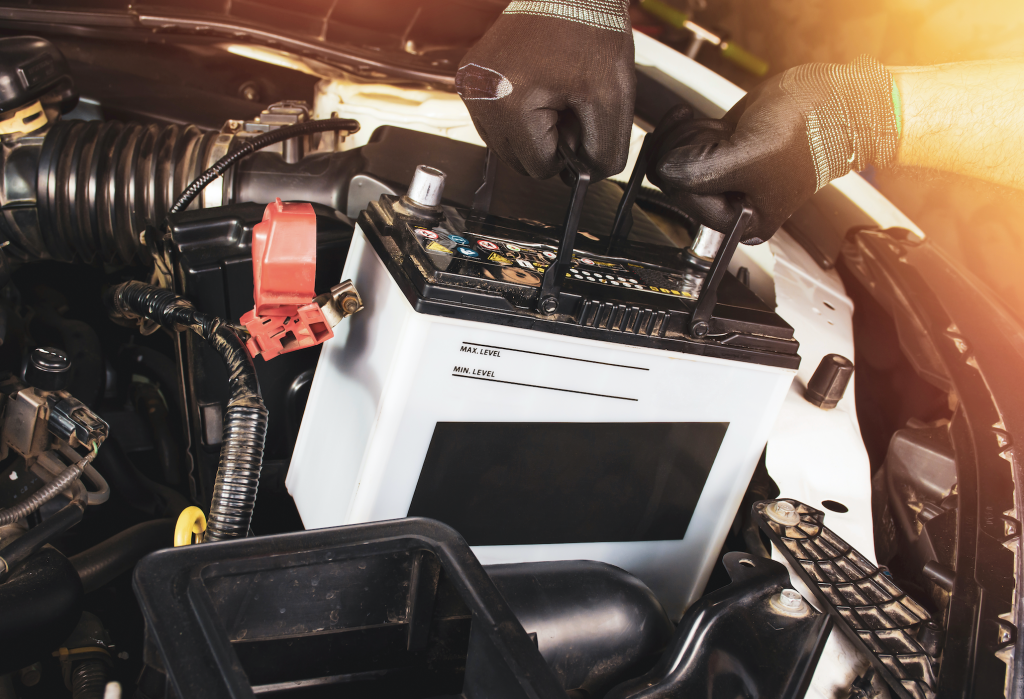
- Now that both cables are detached from the terminals, you want to unclamp the battery hold-down clamp from the battery. You may need to use a wrench or a socket and ratchet. Once the clamp is off, remove the battery from the holding tray. Be alert, batteries are heavy.
- Use a battery cleaning solution to clean the holding tray, cables, and nuts/ bolts. You want to use an anti-corrosive cleaning solution and you want to pay extra attention to any spots with corrosion. Once your parts are clean, give them enough time to completely dry before inserting the new battery.
- Once the parts are dry, insert the new battery and secure the battery with the hold-down clamp. Apply an anti-corrosive solution to both terminal ends. Once this is completed, attach the positive battery cable first and repeat it with the negative cable. Make sure you tighten both terminals to ensure you have a tight and secure connection.
- Check the security of the battery, your battery should not be able to wiggle or move once inside the holding tray. If your battery is able to move, tighten the clamp and be sure the cables are tight and secure, as well. Before closing up, try starting your vehicle to ensure that everything is working properly.
Connect with us


Recent Blog Entries
- The 2027 Nissan Frontier Sport Is for Drivers Who Want the Fun Part Without the Full PRO-4X Price
- Drive Home More for Less with July Offers at Younger Nissan
- Why Nissan Rogue Drivers Are Already Interested in the 2027 Rogue Hybrid e-POWER
- Nissan Savings Continue at Younger Nissan Through June 30
- What the Nissan Pathfinder Gets Right That Most 3-Row SUVs Miss